27/08/2023

Mountain Goat


After almost 10 years of being active in SOTA, past august 19th I achieved the  Mountain Goat certificate, after reaching 1,000 activator points.

This was made during the 2023 Soria SOTA Tour, when I activated 13 summits from august 18th to 26th. It was during the second activation of the day at Mt Toranzo, ref. EA1/SO-11 for 6 points, making a total of 1,003 points.


Together with the forest warden I celebrated the event -with orange juice. She was explained the "weird" celebration, but then I knew that a close friend of her is also a ham operator. She called him by phone and we were able to share the moment remotely.


Of course I worked some of my usual VHF fellow chasers too. Despite of being on a quite unpopulated spanish province -Soria- I was able to qualify the summit on VHF with Julian EA2ETB, Fernando EA1AAP, Joaquin EA2CCG, Oscar EC2UT y Mique EA2EUS from the nearby territories of Nafarroa, La Rioja and Saragossa. 


Celebrating at Toranzo

After some chat with these friends, time for some QSOs on 20m CW. Not many, as the propagation was not the best, and I had the intention of making a 3rd activation that same day.

A long trip, ten years long from my first summit, Arrola EA2/BI-053 on october 6th, 2013 to august 19th, 2023 on Toranzo. A bit older, but keeping the same spirit and a lot more experience!

Then I continued my tour until august 26, when after the 13th activation at Cabimonteros EA1/LR-033 and 1.200 Kms, finally arrived at home. 

Waiting for the next one, thanks a lot to all chasers and activators which made all this possible!


27/04/2023

EA2/BI-033 Sollube SOTA activation

Yesterday I made a short afternoon activation of Sollube Mt. (SOTA Ref. EA2/BI-033) near Bermeo, at the biscaine coastline. This is a drive-in summit, full of comm towers, where the RFI mainly, but not only, on VHF and UHF bands, are huge. 

My goal on this activation was to test some portable equipment recently arrived to my station or being there for long time but not being used before. In this particular case, the targets were my new Xiegu X6100 portable rig, and the JPC-12 antenna, and how they would work together. Also we wanted to check how the new FT8 android apps work in order to use them as a compact SOTA digital station. So I carried all the wires and connectors needed to do so.

Sollube, EA2/BI-033

When arriving to the summit around 15:30 local time, the weather was sunny and temperature about 23ºC, with no wind. One of the tests I wanted to do was checking whether the antenna could be able to manage a medium wind without using any kind of help -say 3 rope winds- but this could not be be made under these conditions.

The antenna

Once all items out of the rucksack, first thing to mount was the JPC-12 antenna. This antenna can be found on a number of well known chinese stores, as at USA and EU radio gear commerces as well. It consists in a metallic pike, 4 aluminum tubes, an adjustable coil and a telescopic wipe. All together makes a 4.2 m high vertical multiband antenna, working from 7 to 50 MHz bands to up to 100w output. When stored back in its bag (already provided),  its length is only 33 cm, weighting about 1.4 Kg. It also brings 10 radials of very thin wire (computer flat ribbon wire type) working at ground level.

JPC-12 antenna

Obviously, being supported by a pike, you need a specific kind of terrain, making it difficult to install on rocky or sandy ones. Probably on these cases, some paracord winds tied under the middle coil might be used to secure it. I think the supplied pike is a bit short for the height of the antenna. The builders could use the bag size to implement a 33cm pike instead the actual 25cm one, making it a bit safer at least.

All the parts use the same M10 screw mounting, so it's very easy to tie all them together, being it quite intuitive and fast. The mounting order is: ground pike, feed point (PL-259 type), 4 aluminum rods, adjustable coil and finally the telescopic (2.4m) rod. Don't forget (as I did) to connect the gound wires between the pike and the bottom side of the feeder before going on. The parts cannot be mounted on a wrong way due to male-female connections, but they can be mounted on a wrong order. Be careful on this, I have already read on the net that some people have mounted the adjustment coil on the base, just after the feeding part. On the other hand, this one have a rugged surface, very useful while sticking the pike to the ground.

The user manual (also included) tells to deploy at least 3 radials, but being at ground level and no tuned, I chose to install all of them. To do this you must take apart all the thin wires that come joint as a ribbon, and then distribute them evenly around the antenna.


Once the antenna installed, my intention was to adjust it on the different bands using the nanoVNA which I previously had calibrated at home. No way. Due to the strong RF signals at the summit, the readings were continously changing, showing random weird values. Same thing has already happened to me on several similar RF seriously polluted summits. Fortunately, the X6100 has an option of SWR check which later provided me with at last a rough measure of the behaviour of the antenna.

So that I did. Install and connect all kind of items to the transceiver, that is: microphone, battery (5200 mAh Lipo 3S 11.7v), cw iambic keyer, usb C cable and BNC antenna connector. For this I used a short 2m RG-174 male PL-259 to male BNC with a small choke on the radio side, trying to avoid RF signals on the usb connection to the phone (and it worked!)

Once the Xiegu turned on, the first thing to remark was that the display. It was easily seen, despite the sun light (my phone was not so good on this when taking the photos). I adjusted the antenna to the proposed point of the coil for the 20 m band (it has two marks, for 20 and 40m bands), change the rig to the SWR check mode and run it. I had to change only one turn (making the virtual length of the antenna longer) to have it at 1.3:1 ratio over all the 20 band. Actually, the minimum span of the X6100 check is 1 MHz, so I could see the SWR value from 13.9 to 14.9 MHz. 

More fine adjustment can be done by shortening slightly the telescopic rod, but in this case, it was not necessary. I was really surprised by the width of the working range, being a "short" antenna, loaded with a coil, at least compared with my previous experiences with other similar (but quite shorter) antennas. Almost the same happened on 30 and 40m bands, the adjustments being easy, wide, and accurate. I guess it can be due -at least partially- to ground losses caused by a basic radials system. 

In summary, the antena is well mechanized, strong, and easy and quick to be installed and adjusted, provided you have some way to check the SWR ratio on the chosen frequency. No need to use an ATU, so that is less weight you must carry to the summit. It performed well  on the 20/30/40m bands, having at sight that a quite strong CME was on, and the conditions were not the best. It could be appropiated particularly on small summits, where a pole supporting and EFHW or CF dipole could not be installed. OTOH, the 1.4 Kg weight and the size of its bag is not small and could determine the size of the rucksack needed.

The rig

As previously said, the first thing was the display. Even under strong sun light it was easily visible, a good point. The ability to check the SWR was also very useful. However, the use of the different options are not the most intuitive. Basic items -like power output adjustment, keyer speed, or RIT- are kind of hidden among other features not so commonly used. It would also be prefereable other kind of setting the freq stepping, for example, by pushing the main VFO knob. Better if you learn all these at home, before going onto work at the summit!

The waterfall is pretty, and capable of being adjusted on amplitude (other bigger and more expensive rigs cannot), but not particulary useful while SOTA activating, as usually you are going to stay on a fixed frequency, but it always can give you an idea of the band activity or conditions.

The noise reduction was not useful at all. Even on the lowest levels, the behaviour is extremely aggresive, making the signals weird and hard to be copied. Some firmware work have to be made in order to improve it seriously.

By this moment I had operated mainly on CW, but I also used SSB to check the clarity and readiness of my signals. The controls given were not the best, and I found the PTT switch of the mike a bit soft, not making a clear on-off, but overall it was not so bad.

Although the X6100 has its internal battery, the maximum power available when you use it is only 5w. In order to have up to 10-12 w (band depending) the use of an external power supply is a must. But be aware that any source giving more that 10-11 volts will cause a sensible heating of the equipment. So, LiPo 11.7 volts 3S batteries are strongly recommended. As an alternative, some kind of heat sinks attached to it can be used (There are some raspberry ones that can be easily adapted)

FT8 Android Apps

Although FT8 is not my preferred mode at all, this is quickly becoming one of the most used modes, and the needing of carrying some kind of computer (tablet PC, raspberry, etc) has refrained its use on portable scenaries. 

Now we have at least two android apps making possible its use with some rigs and a simple smartphone, that you probably are already carrying during your SOTA activations for using it as GPS tracker, for self-spotting, S2S QSOs and so. These are:

FT8 Radio (at 9.99$)

FT8CN by BG7YOZ, and freely available on Github

They both work with a number of rigs -using a bluetooth connection or via an USB OTG cable, like IC-705, Xiegu X6100, Lab599 TX-500, QDX, uBITX, etc. They all have an internal audio card, but it can be also used by means of an external USB audio card

Working procedures and interface are not similar to the usual WSJT-X way, and each one has its own particularities. I found FT8CN more adequated to my needs as activator as I am normally more interested on calling CQ and less on answering calls.With this one it is easier to find clear frequencies to call -using its own waterfall- and to keep your transmission freq fixed. In my POV, it also manages better the QSO interchange, but this is a matter of taste.

They are both in a developing state and must be still refined regarding to its operation procedures but the two give you a way to work this mode without carrying any suplementary equipment. 

Any further question? Please let me know, and thanks for reading, 73!


05/04/2023

Consejos para una activación SOTA con éxito


Trataré aquí de resumir algunos consejos para conseguir una activación SOTA con éxito. Algunos de ellos son tan obvios que pueden olvidarse con facilidad. La mayoría provienen de mi experiencia a lo largo de 10 años y 300 activaciones, casi todas incluyendo la operación en telegrafía. 

Y recuerda: Cualquier activación será mas sencilla si llevas antena, equipo, una batería cargada, manipulador, bloc de notas y lápiz! ;-)

Nota: Casi todo lo expuesto puede aplicarse a cualquier tipo de activación SOTA, sea en VHF, HF, SSB, datos, etc.

Empecemos pues! En cualquier activación SOTA, existen una serie de cuestiones a tener en cuenta. Estas son algunas:

Antes de iniciar la activación:

  • Planificación, planificación y mas planificación. En lo relativo al viaje, la ruta de subida, los tiempos, el periodo de luz según la epoca de año, la climatología, la zona de activación, cobertura de móvil, cobertura de repetidores de V/UHF y DMR, etc.
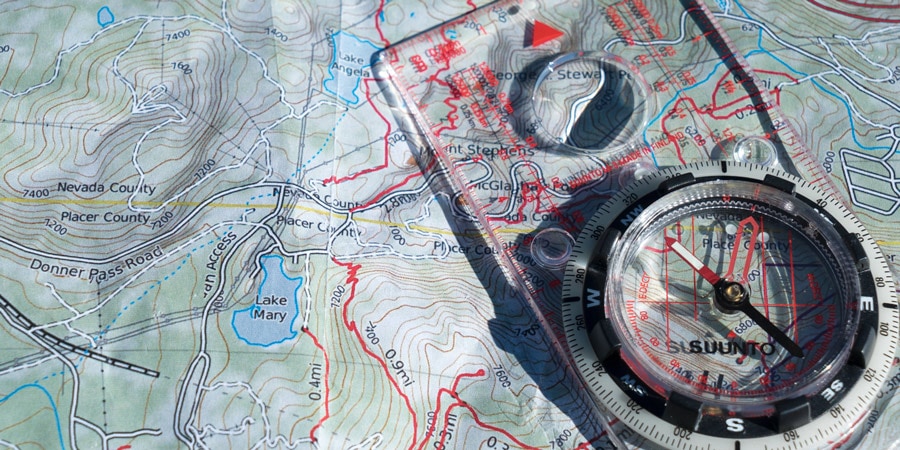
  • Antes de comenzar el viaje, en casa, comprueba que tienes listos todos los elementos de radio: equipo, antenas, conectores, batería(s) cargada(s), micro, manipulador, bloc de notas, lápiz (bolígrafo), teléfono móvil, brújula, GPS, lo que sea. Procura hacer -y usar- una lista de comprobación, y revisar la mochila para asegurarte de que no has sacado nada desde la anterior activación.
  • Comprueba atentamente la previsión metereológica de la zona, te ayudará a elegir la ropa y elementos de refugio adecuados.
  • Lo mismo para el resto del equipo: los 10 esenciales, comida, agua, ropa de repuesto, refugio, etc.
  • Una vez hecho esto, pon una alerta en SOTAwatch. Al hacerlo, el sistema  RBNhole te "espoteará" automáticamente durante tu activación en cualquier frecuencia de CW en la que transmitas, en un intervalo de -1 a +3 horas de la que hayas puesto en la alerta. También, en otros modos, servirá para que los cazadores estén atentos a tus transmisiones y, opcionalmente, pongan sus propios spots en SOTAwatch.
  • Si formas parte de algún grupo local de SOTA (correo-e, redes sociales, etc.) infórmales de tus planes. Haz lo mismo con tus amigos y/o familia. Intenta mantener el GPS de tu teléfono móvil activado, será util para ayudar a localizarte en caso de emergencia.

Una vez en la activación:

Ten siempre en cuenta que una activación SOTA está caracterizada por una serie de factores. Tu seguidad es el mas importante de ellos. El tiempo de luz solar, las condiciones atmosféricas, y tu estado de forma física determinarán también cómo será la activación. No te sientas obligado a operar en algún modo, banda, duración, etc. La hora de llegada y la duración de la activación que has puesto en la alerta son solo estimaciones, no un compromiso firmado. Las condiciones climáticas pueden cambiar, o echarse la noche. Por tanto, adecúa siempre la activación a tu seguridad. Dicho todo esto, ¡empezamos!

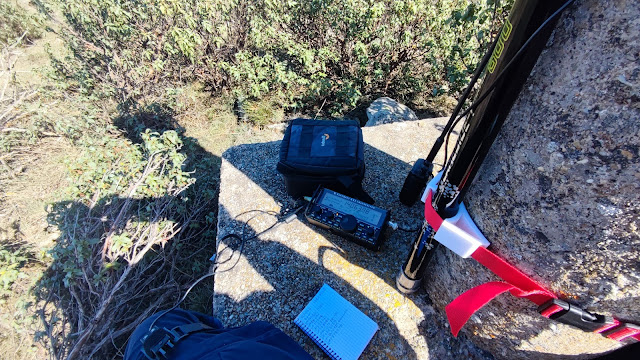
Prepara la antena, emisora y todos los elementos necesarios para operar (micrófono, manipulador, grabadora, bloc, lápiz, auriculares, etc). 

Intenta poner en el aire la mejor señal posible (antena, potencia, situación,...) Ayudará a que se te oiga y entienda mejor en caso de que avises de cambios de frecuencia, apagado de la radio, llames a indicativos parciales, etc. Piensa en la mejor estrategia potencia / duración de la batería a usar para lograrlo.

Una vez que lo tengas todo listo, pon un "spot" en SOTAwatch (si es posible). Si no, también tienes la posibilidad de llamar por algún repetidor de V/UHF FM o DMR y pedir que te "espoteen". También puedes hacerlo por SMS o APRS. Comprueba si te hace falta. (¡Recuerda que ya lo has planificado!)

Haz una primera llamada CQ lo suficientemente larga para que sea detectada por el RBNhole. Incluye en ella la referencia de la cumbre.  Esto es especialmente importante en el caso de que no hayas podido poner un spot de la forma tradicional. El RBNhole utilizará los datos de tu alerta previa para publicar automáticamente esta información como un spot en SOTAwatch.

Cuando comiences a hacer contactos, mantente tranquilo. El comportamiento de los cazadores en el pile-up será un reflejo del tuyo. Si no puedes copiar un indicativo completo, pregunta por el indicativo parcial, pero siempre con calma y relajado. Los cazadores están en casa, no bajo una lluvia intensa, el frio o viento!

No uses una velocidad muy alta; tu señal probablemente no sea muy fuerte y debes ser claro y constante. Entre 20 y 25 ppm será mas que suficiente. Esto no es un concurso y tu objetivo es hacer cuantos mas contactos puedas, pero 4 son suficientes para validar la cumbre.

Intenta adecuar tu velocidad -si te lo permite el equipo- a la de tu corresponsal durante el QSO. Si no puedes, deja espacios mas largos entre los caracteres para que tu transmisión se pueda copiar mas fácilmente (Metodo Farnsworth)

Mantén un ritmo constante, p. ej. acaba siempre tus transmisiones con: [indicativo] TU 73 DE [tu_indicativo] K. Ayudará a que los cazadores sigan tu estilo de transmisión y a hacer mas contactos y mas rápidos. 

¡Nunca contestes a los que llamen "fuera de turno"!. Si llamas, p.ej. "AB1?", nunca contestes a un operador "BC2...". Si lo haces, el pile-up se volverá incontrolable. Sigue llamando "AB1?" hasta que te conteste o empieza nuevamente haciendo un CQ corto, llamando "QRZ" o similar.

Piénsatelo antes de contestar a los "tail-end"*. Si no, los cazadores seguirán llamando durante un largo rato tras tus llamadas.
(Tail-end es una técnica que consiste en llamar antes de que el QSO anterior termine, o esperar a que las estaciones mas potentes acaben de llamar y empezar mas tarde. Puede provocar que si no contestas a los primeros, estos se impacienten y repitan su llamada y asi sucesivamente)

Intenta escuchar un poco desplazado de tu frecuencia de transmisión, digamos entre 100 y 300 Hz hacia arriba o abajo. Hará que los que llaman se distribuyan un poco, tu frecuencia de transmision estará mas limpia y podrás escuchar los diferentes tonos mas fácilmente. Los cazadores se darán cuenta rápidamente de esta técnica y la utilizarán. Mejor para todos. 

Intenta también informar a los cazadores en el caso de que tengas que interrumpir la emisión para cambiar algún elemento (antena, batería, etc...), si tienes problemas con el tiempo, elementos caidos, pausas para comer o beber, dar explicaciones a los visitantes,... no desaparezcas sin explicación alguna -si puedes, claro.

Continúa mandando spots cuando cambies de banda o modo, tal y como ya hemos explicado.

Dependiendo de cuánta gente te esté llamando, repite tu indicativo y la referencia SOTA. A veces, dos activadores diferentes pueden estar en la misma frecuencia, alguien ha podido poner un spot incorrecto o, en el caso de activaciones conjuntas, haber cambios de operador. Puedes hacerlo cada 3-4 contactos si tienes poca gente llamando, o cada 10 o 12 llamadas. Si controlas bien el pile-up, puedes llegar a hacer hasta 2 o 3 contactos por minuto.

Una vez que disminuya el número de cazadores, valora si hacer unas cuantas llamadas mas o cambiar de banda, pero intenta permanecer en cada una al menos 10 minutos. Los cazadores no siempre están preparados para responderte nada mas poner tu spot. Además, algunos cazadores en QRP suelen esperar hasta que las estaciones mas potentes te hayan trabajado antes de llamarte. Dales tambien una oportunidad de hacerlo.

Ten siempre en cuenta: El tiempo que puedas estar operando depende de tu seguridad, de las condiciones climaticas, la temperatura, el tiempo estimado de vuelta al coche, tu condición física, etc. ¡Tu eres quien corre el riesgo y tu y solo tu quien decide!

Intenta seguir los mismos hábitos en todas tus activaciones. Los cazadores lo aprenderán y lo usarán para trabajarte. Por ejemplo, empieza en 20m CW, luego SSB, después 30m, mas tarde en 40m,... Usa si es posible las mismas frecuencias entre las mas utilizadas en las activaciones SOTA (por ejemplo, 14.063, 10.119, 7.034, etc). Esto también les dara pistas a los cazadores sobre dónde encontrate y ayudará a lograr una activación con exito.

Y recuerda: una activación fallida es siempre mejor que una arriesgada. El monte siempre estará ahi para que vuelvas otro dia. ¡Si sigues vivo, claro!

Como ya he dicho, toda esta información está basada en mis propias experiencias, y probablemente haya olvidado algun aspecto importante. Así pues, por favor, no dudes en ponerte en contacto conmigo y lo incluiré tan pronto como pueda. 

Gracias y buena activación!

73 de EA2CW 

ea2cw \arroba\ gautxori \punto\ com

https://www.rei.com/dam/van_dragt_102616_0011_navigation.jpg